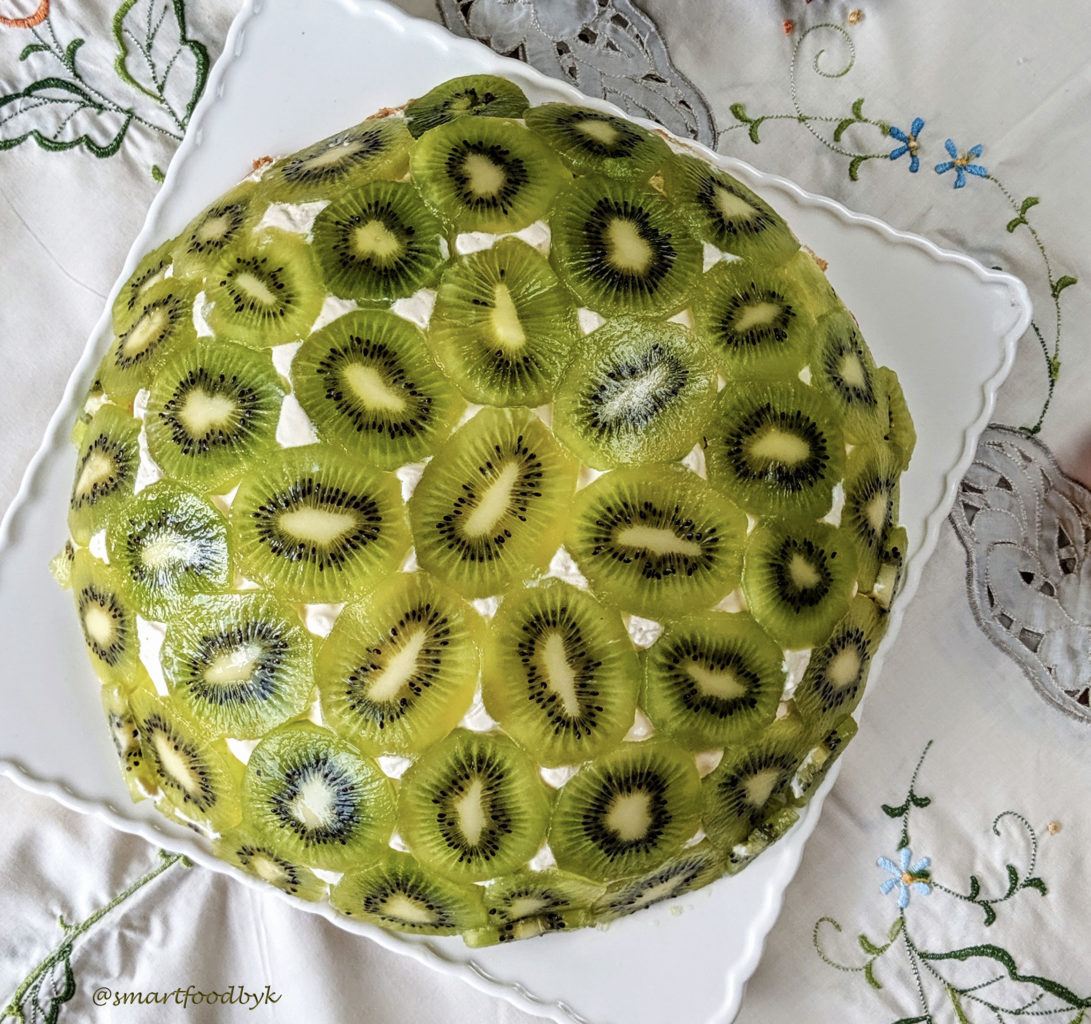
Dome-like Creamy Kiwi Cake

I found this little beauty of creamy kiwi cake on “Tasty Japan” channel and was immediately seduced by its simplicity and lightness, fresh fruit and visual effect. I tried it and decided to adapt it a bit, as often, especially the sponge part 🙂 It is one of my mom’s recipes that I adapted to fit the form and the flavour of this particular cake.
You can of course use a simple brioche (or your favourite sponge cake) from your bakery that you will cut into 0,5-1 cm thick slices to replace the homemade sponge cake.
Serves: 8-10 pieces. Total time: 3h 50 minutes (preparation 30 min, baking 20 min, cooling 3h)
INGREDIENTS (organic)
For the sponge
5 Eggs
5 tablespoons of unrefined Sugar
1 Baking powder
5 tablespoons of Flour
For the cream
500ml liquid Double Cream
300g Greek Yogurt
100-120g of unrefined Sugar
Vanilla extract (a few drops)
To assemble the cake
5-6 big Kiwis
1 Orange
1 Banana
You can use other fruit too according to season. For example: peaches, strawberries, raspberries, blueberries…
PREPARATION
Start by preparing a sponge, you will prepare the rest of the cake while the sponge is baking and then cooling.
- Separate egg whites from the yolks.
- Whisk the yolks and 4 tablespoons of sugar with a mixer or whisk them manually until they transform into a creamy smooth light-coloured paste. Blend the baking powder in.
- Whisk separately the egg whites and the remaining 2 tablespoons of sugar into firm peaks. The sugar helps the whites become firmer and stay that way longer.
- Add the whisked whites delicately to the yolks. Do it manually with a cake spatula making wide circular moves in order not to “break” the whites and the tiny air bubbles captured in it.
- When the paste gets smooth sprinkle it with 5 tablespoons of flour. Blend the flour in making the same delicate circular moves to obtain a smooth, no-lumps, paste.
- Spread the paste on a buttered (or covered with a baking paper) oven plate (the standard one, mine is 37cm x 32cm) and place it in a 180°C pre-heated oven. Bake it for about 20 min at 180°C, take it out when ready (keeping it in would make it too dry), cover it with a clean kitchen towel and let cool down. The result should be a soft, light delicious golden sponge, 0,5-1 cm thick.
While the sponge is baking you can prepare a dome-shaped cake mould. I use a salad bowl of 25cm of diameter.
Cream:
- Whip the double cream with the sugar and the vanilla extract to a firm foam. Add the greek yogurt and whip some more to blend it in. Let it cool in the fridge while you are peeling and cutting the fruit.
Assembling the cake:

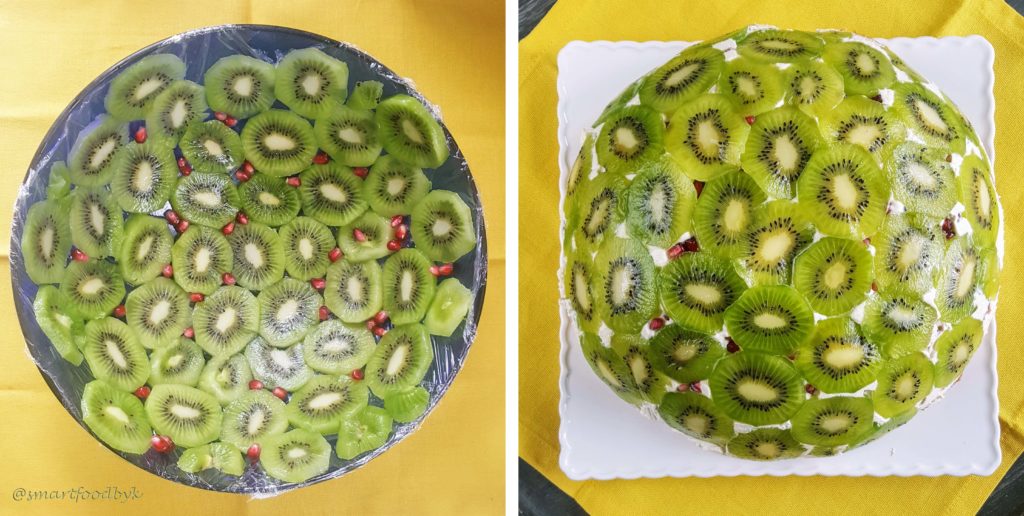
- Cover the interior of the mould entirely with a plastic wrap (like in the photo). As I am very concerned about the environmental pollution I do not like using this wrap but I did not find anything more convenient so far. If you have ideas how to replace it, I would be happy to hear them 🙂
- Cut the peeled kiwis and a banana into 2-3mm thick slices and an orange into dice.
- Cut the cooled sponge into 5-6cm long rectangles and start assembling the dome cake.
- Cover the mould entirely with the kiwi slices (like in a photo). I put some pomegranate grains in the littles holes between the kiwi slices for some additional visual effect but it is absolutely not necessary.
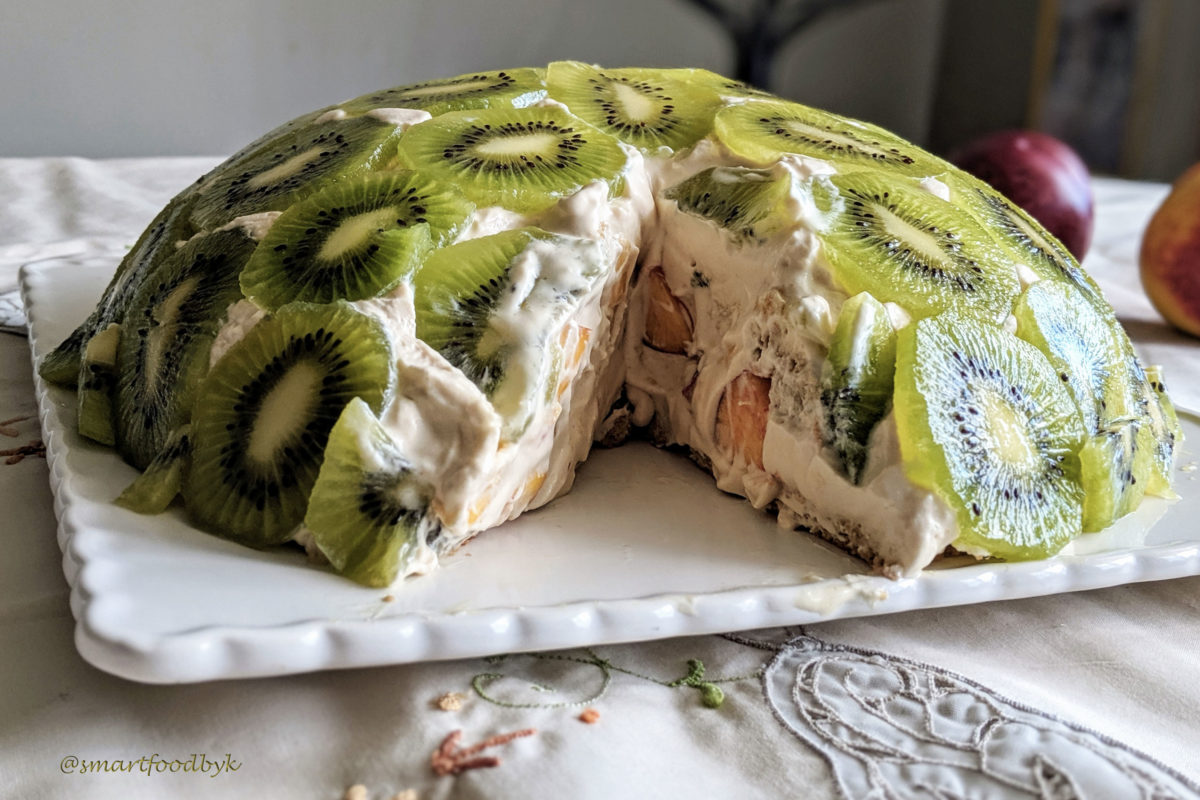
- Cover the kiwi slices all around with a thick layer of cooled cream and add 2-3 more tablespoonfuls of cream at the bottom of the mold. Sprinkle with some orange dice and banana slices and cover with sponge rectangles to close this first creamy juicy cake layer.
- Spread a few tablespoons of cream on this first layer of sponge, sprinkle with the fruit, close it with the sponge rectangles.
- Repeat until you cover the entire bowl mould to a flat surface. Place it in the fridge for about 3 hours.
- Unmoulding is a delicate procedure having in mind that you want to see this dome standing and not crumbling down. Cover the mould with a flat plate large enough and then turn it upside down in a rapid but not abrupt move. Take the mould off slowly (it should come off easily), take the plastic wrap off too and admire this beauty you made for a few moments before eating it (in one sitting like we do 😉 )

In case you would like to check it out, the original “Tasty Japan” recipe is here.


